🧭 Vendor Portal Help Document
Thank you for your interest in collaborating with Zamplia!
This document provides a step-by-step guide to help you onboard as an API vendor on Zamplia.
Our goal is to make the onboarding process simple, smooth, and efficient so you can complete all the required steps easily and start working with us quickly.
The portal has been designed to streamline setup, ensuring we can begin our partnership promptly and achieve mutual growth together.
🏁 Set Up Your Account
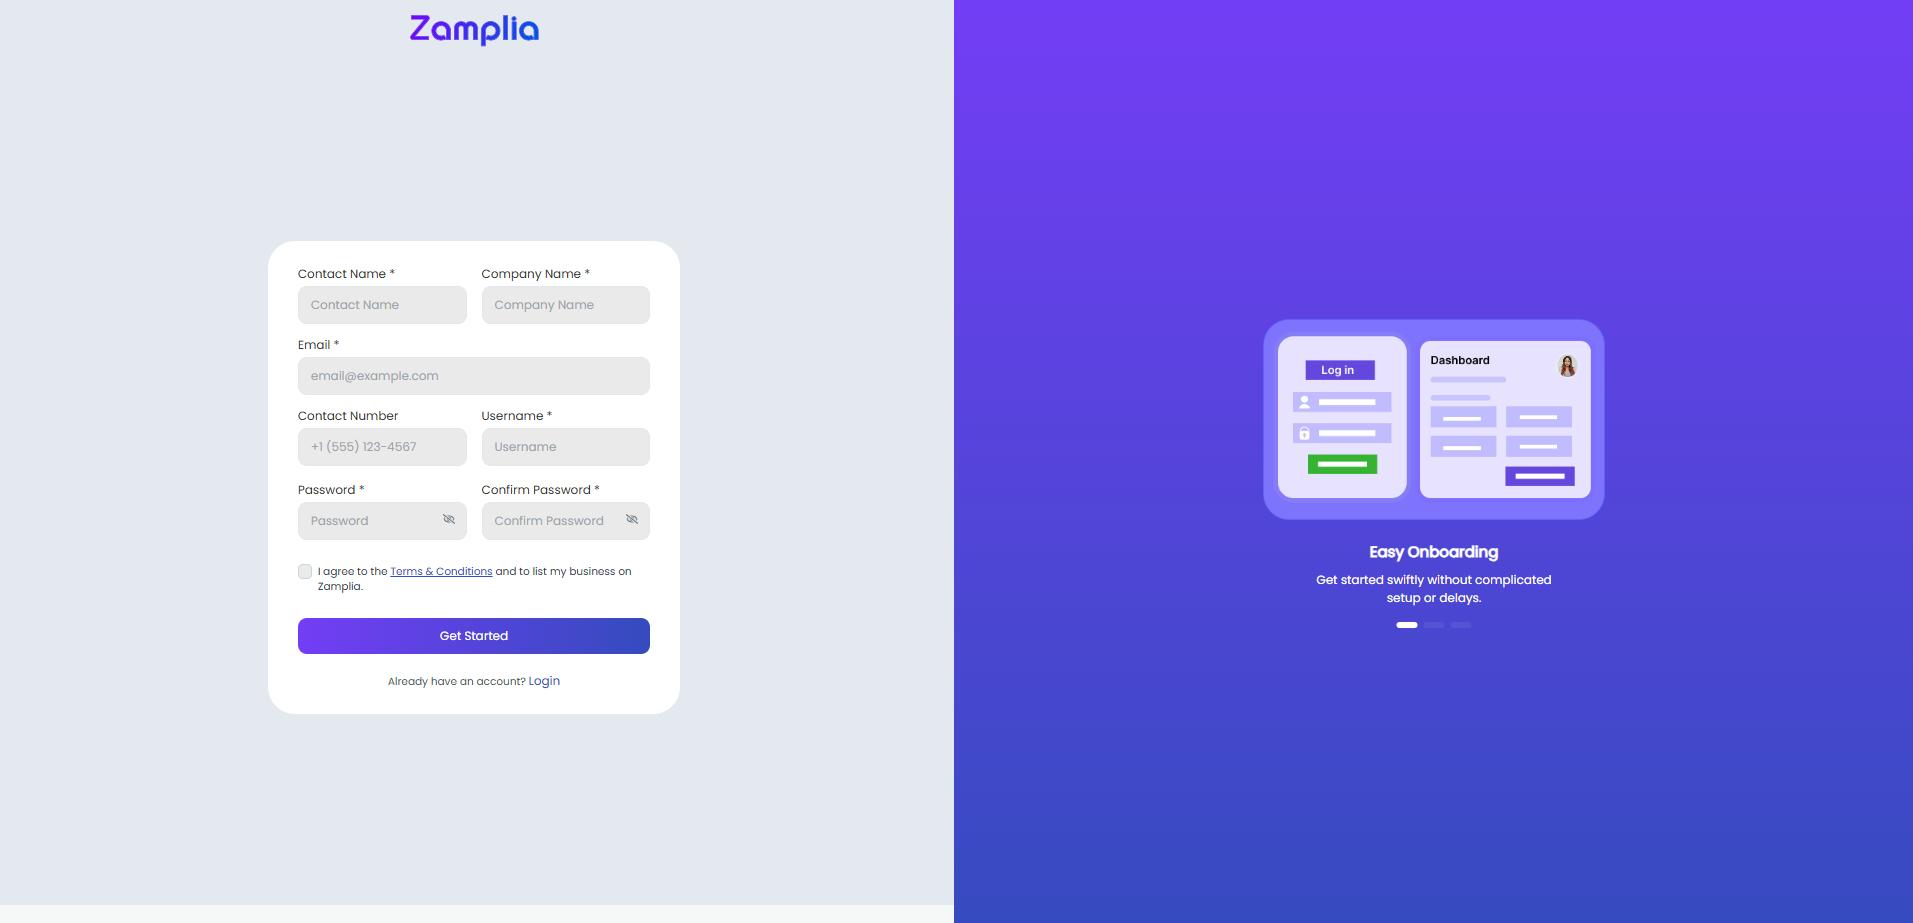
To begin, visit the signup page: https://vendor.zamplia.com/signup
Step 1: Fill in your basic details:
- Contact Name
- Company Name
- Email Address (an OTP will be sent to this email for verification)
- Contact Number
Step 2: Create your login credentials:
- Username
- Password
- Confirm Password
Step 3: Agree to the Terms & Conditions and click Get Started.
Once your email verification is complete and your account is created, you’ll be able to log in and access your vendor dashboard on the Zamplia Portal.
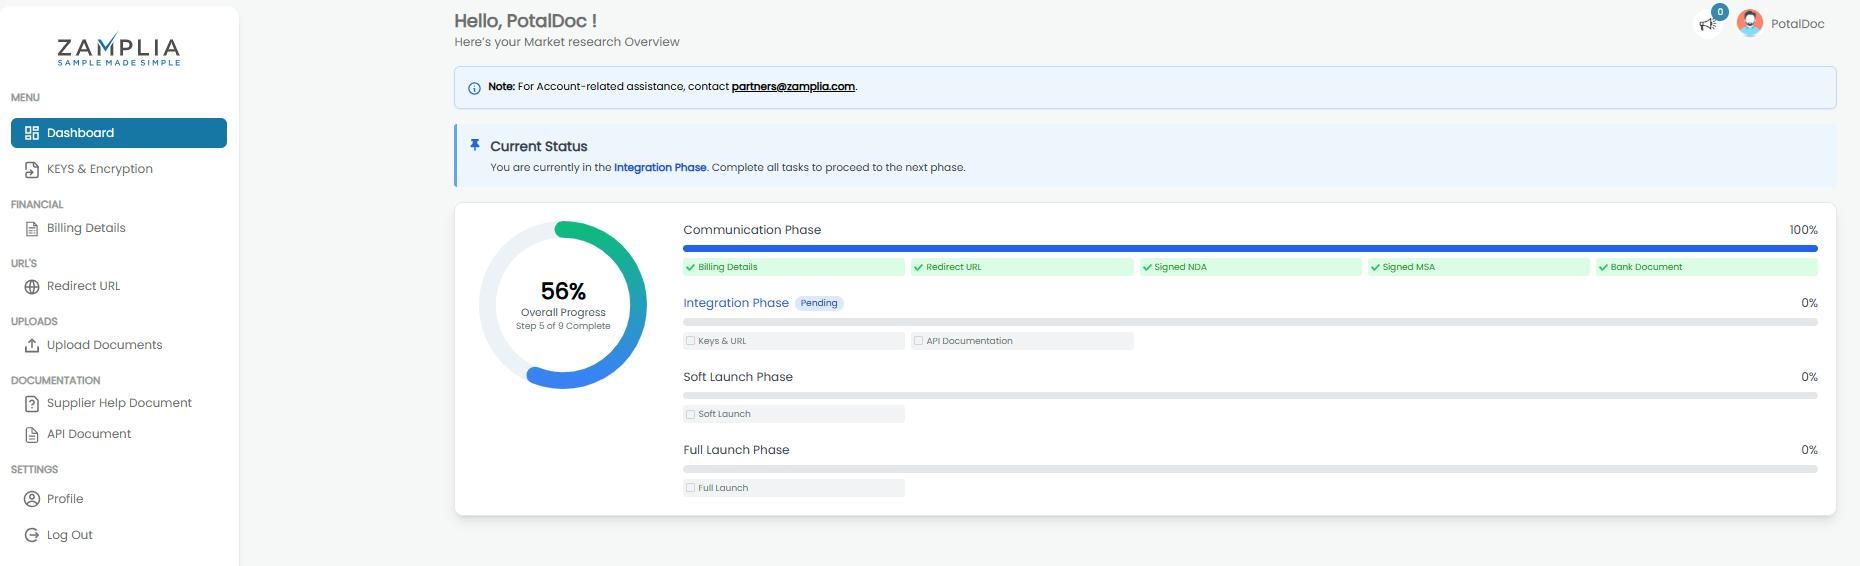
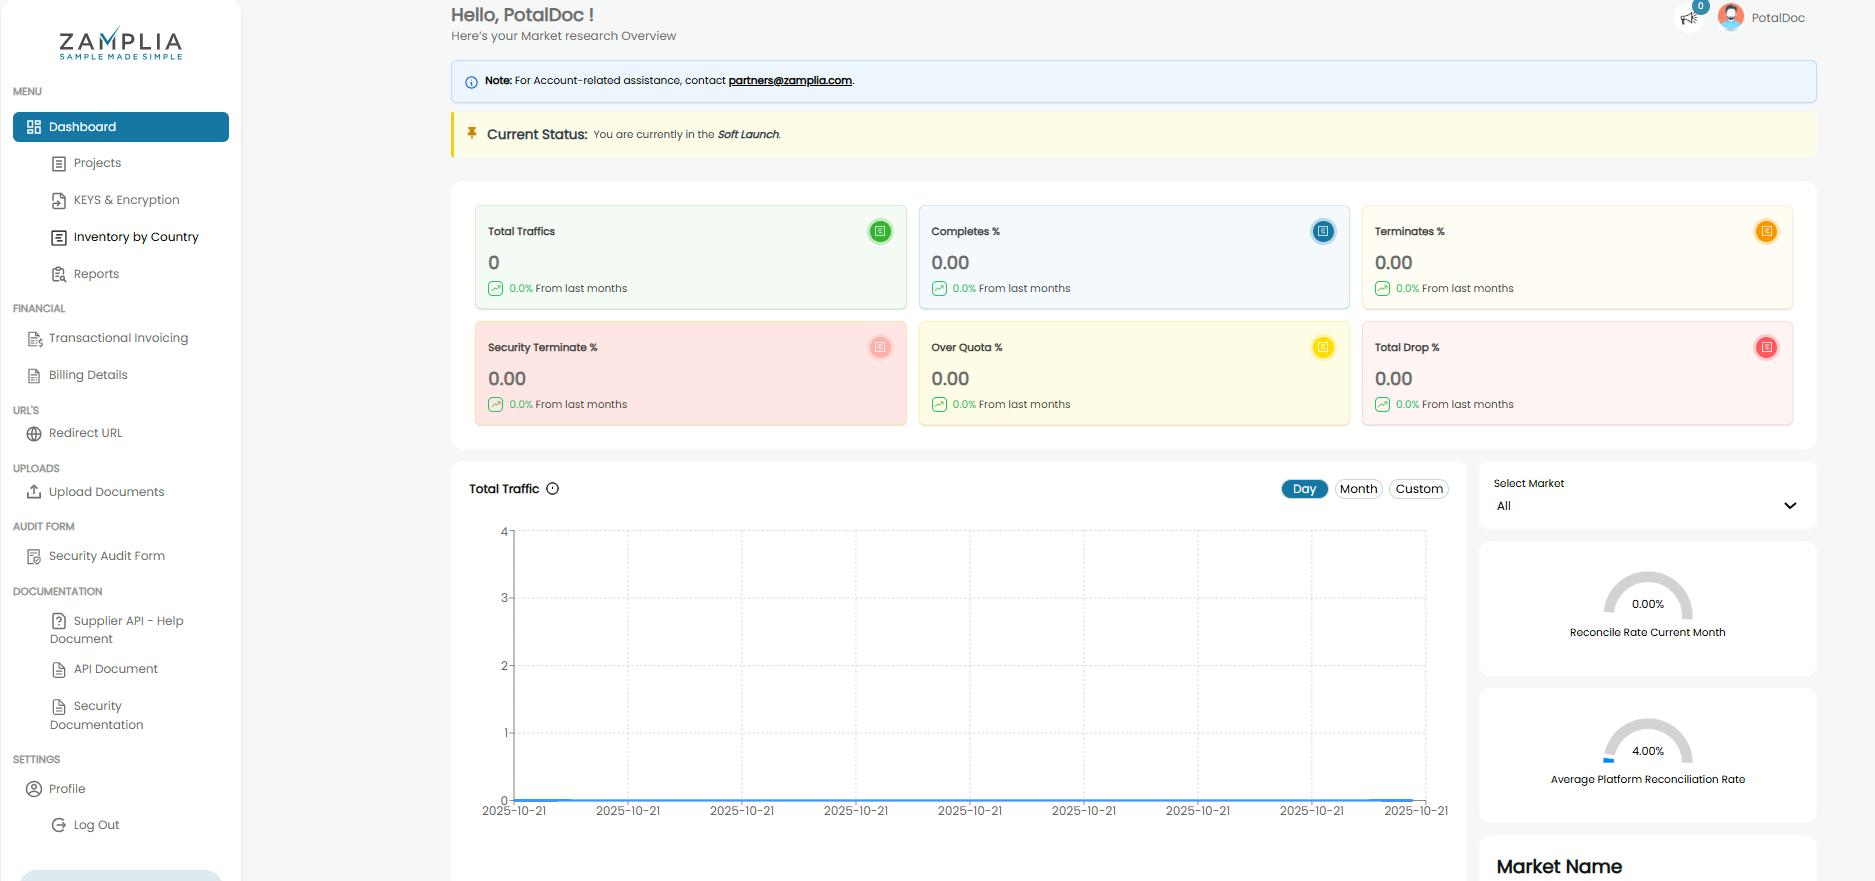
🖥️ Dashboard
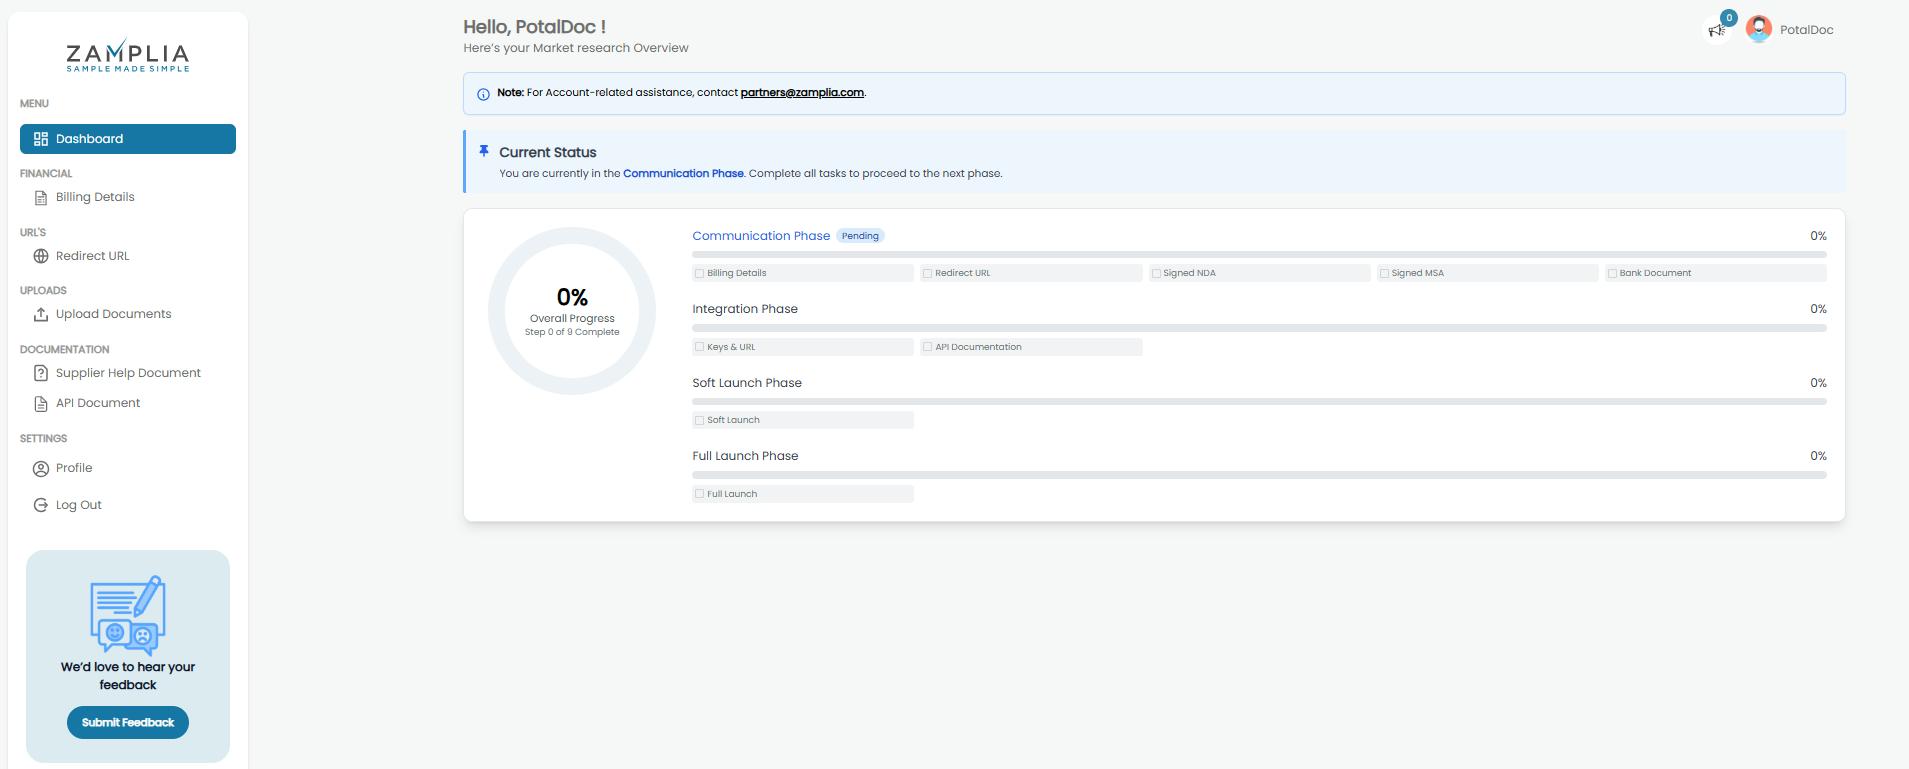
Once you sign up, you will land on the Dashboard of the portal. Here, you can track all the phases you have completed in the onboarding process.
As shown in the screenshot below, the overall progress is currently 0%, and the account is in the Communication phase. From this dashboard, the documentation process will begin.
🧩 Phase 1: Communication Phase
In this phase, you need to complete the following steps:
- Billing Details
- Redirect URL
- Sign NDA and MSA
- Upload Banking Documents for verification
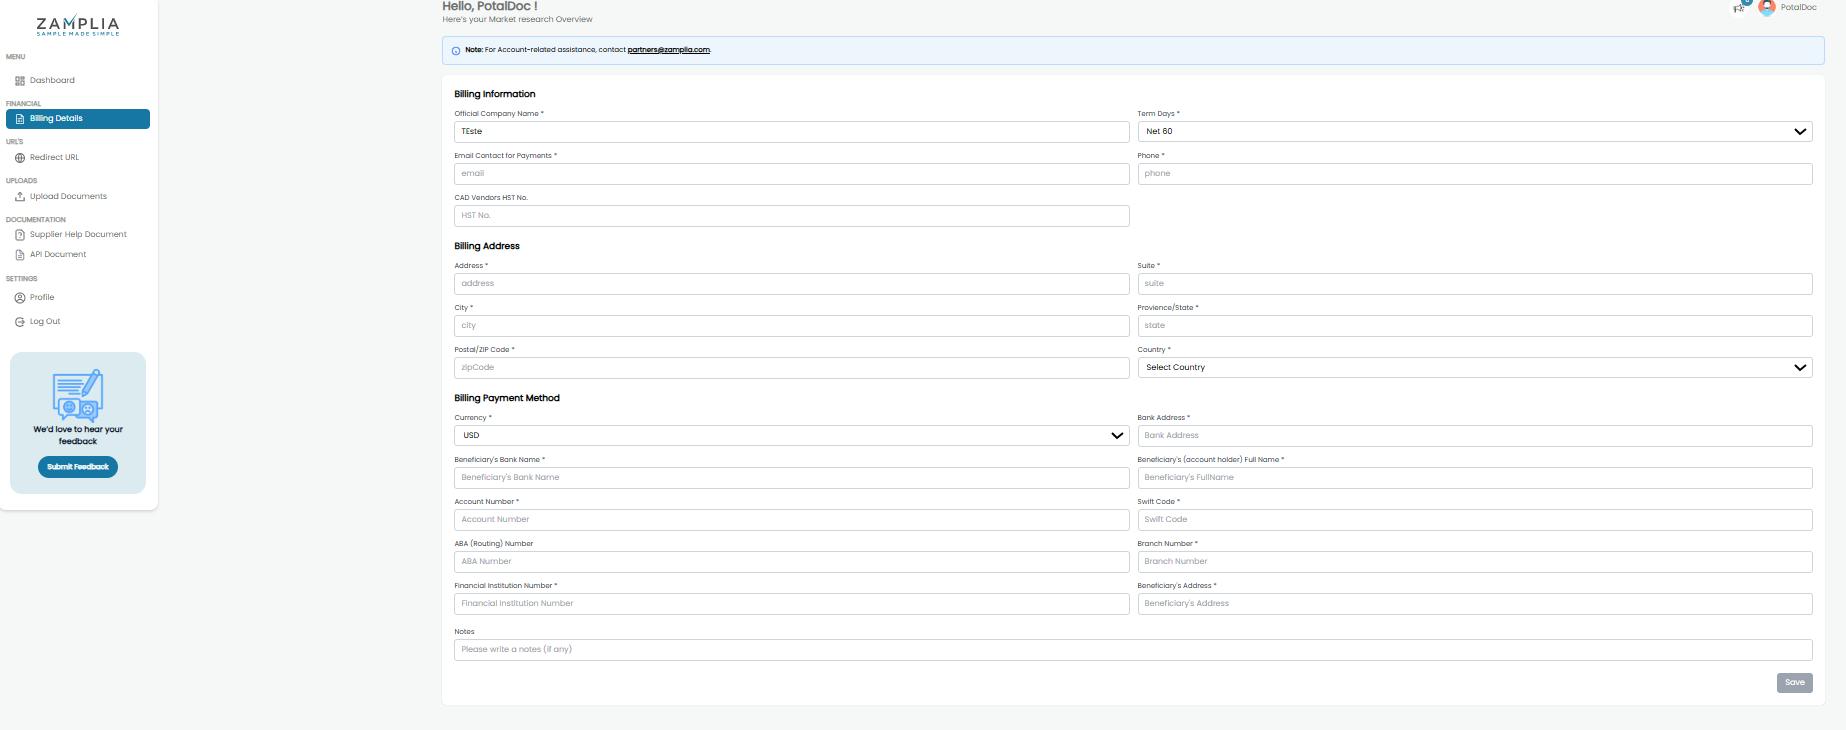
Step 1: Billing Details
- Navigate to Billing Details.
- Fill in all the correct company information and banking details in the form.
⚠️ Important: The bank and company must be in the same country.
- If you have any notes or additional information for us, you can add them in the notes section at the end of the form.
- After completing all details, click the Save button at the bottom-right of the page.
Step 2: Redirect URL
- Navigate to the Redirect URL tab.
- Implement the redirect URLs for the correct statuses as specified.
- In Variable 2, provide the variable for User ID / Transactional ID / Respondent ID.
- Click Save to update the page.

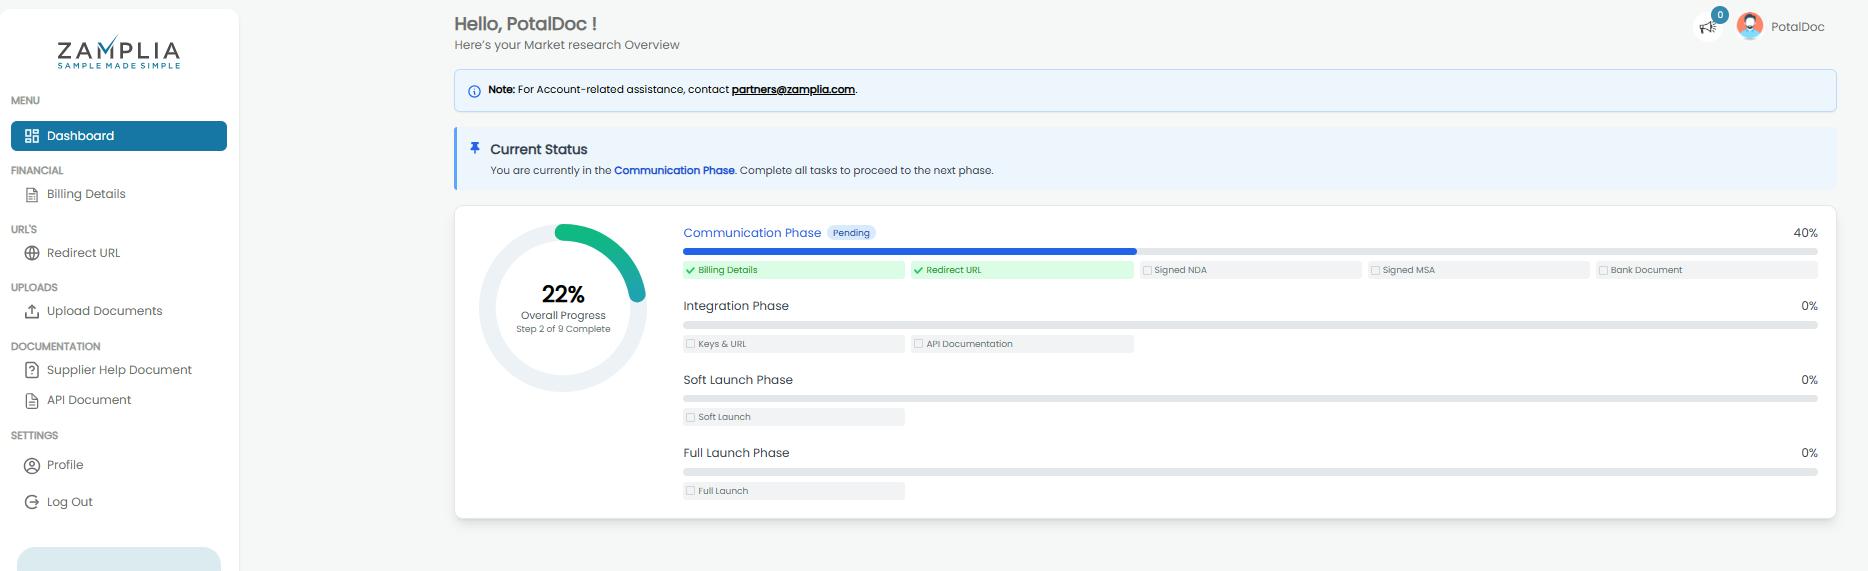
Once these steps are completed, you can check your progress on the Dashboard.
As shown in the screenshot below, the progress is now 22%, indicating that two steps of the Communication phase have been completed.
Step 3: NDA and MSA
This step helps you complete three sub-steps under the Upload Documents section.
- Navigate to the Upload Documents tab.
a) NDA
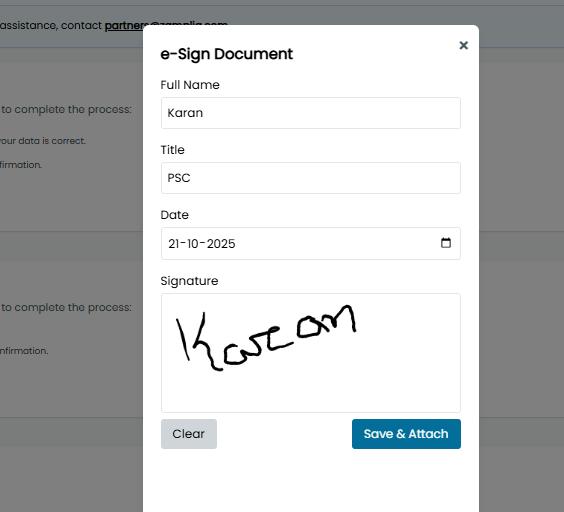
- Click Preview to review the NDA agreement and read all details carefully.
- Once you are ready to proceed, click Sign the NDA to e-sign the agreement.
- After signing, click Save & Attach.
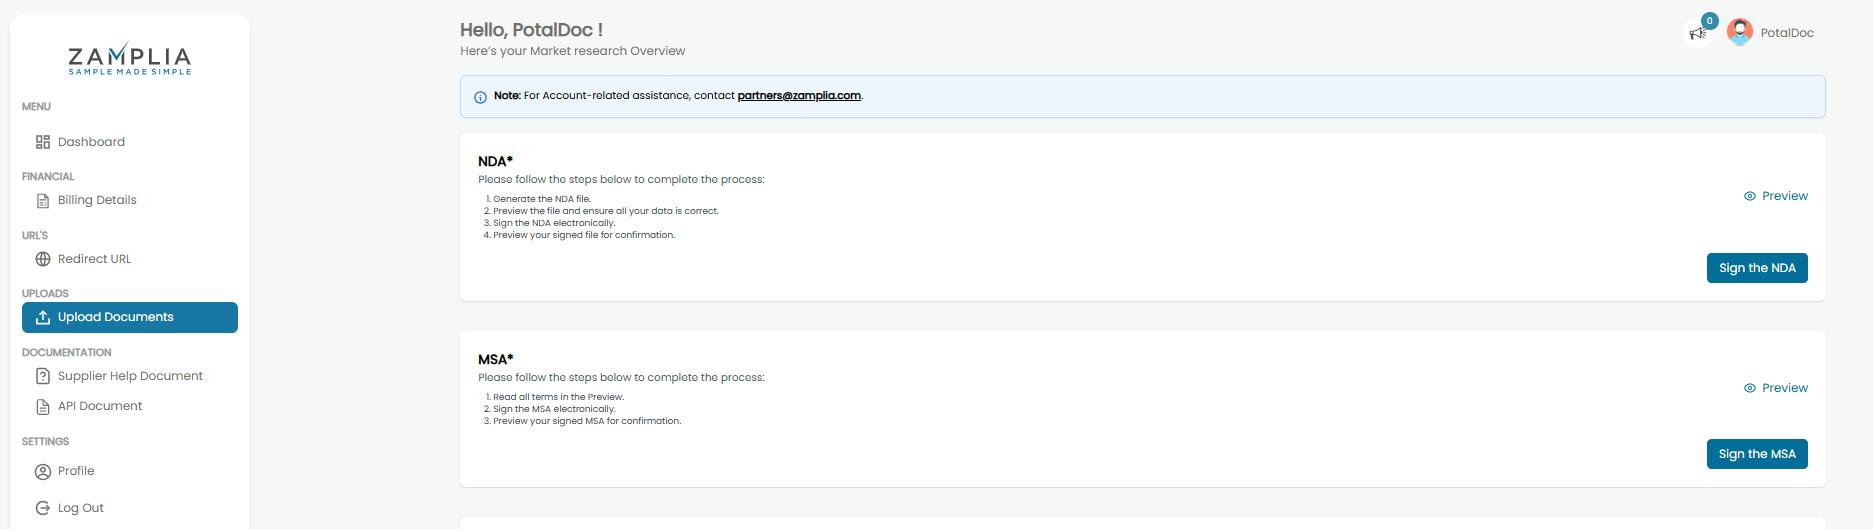
b) MSA
- Similarly, preview the MSA document and read through it carefully.
- If everything looks correct, sign the MSA and click Save.
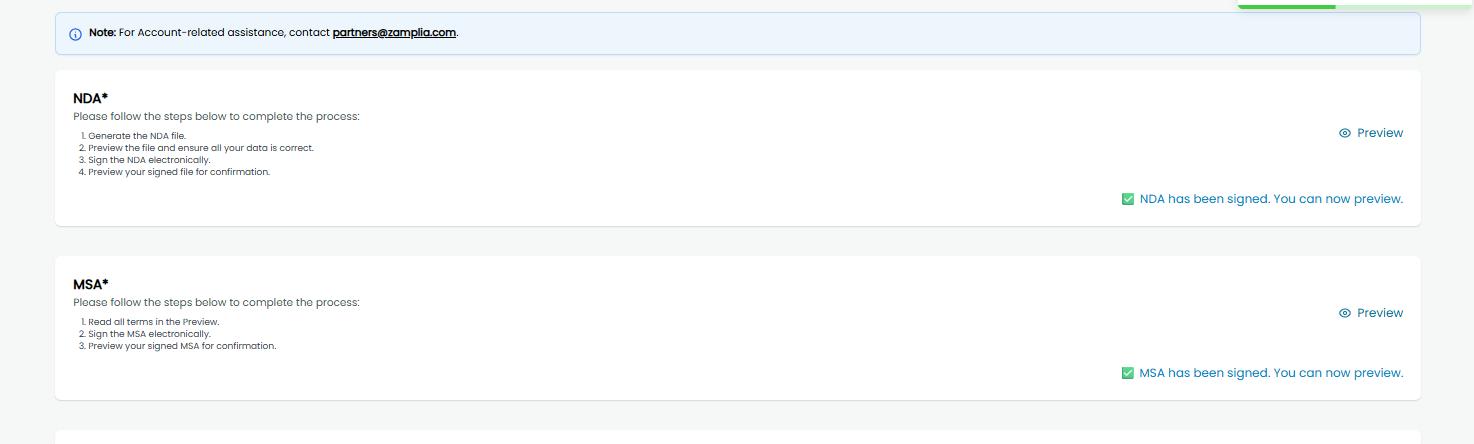
✅ Once these steps are completed, you will see a green tick, indicating that the NDA and MSA steps have been successfully completed.
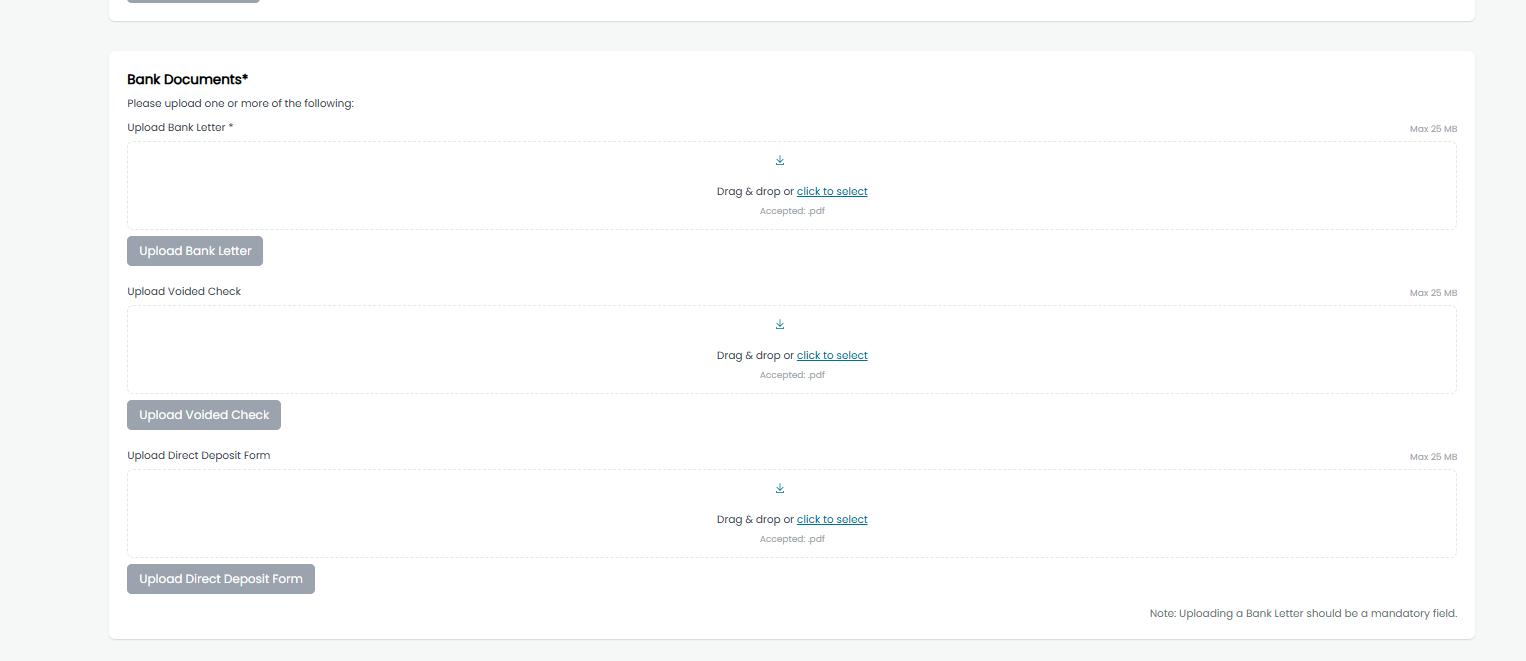
Step 4: Banking Documents
On the same page, scroll down to the Bank Documents section. You will have the option to upload three documents:
| Document | Description |
|---|---|
| Bank Letter | A certification letter from your bank confirming your company’s affiliation with the bank. |
| Voided Cheque | A cheque marked “VOID,” indicating it cannot be used for payment. Organizations use this to verify your bank account details. |
| Direct Deposit Form | Authorizes an organization to deposit payments directly into your bank account instead of issuing paper checks. |
 |
✅ Completion of Phase 1: Communication Phase
Once you have completed all steps in Phase 1 (Communication Phase), we will review the submitted documentation and verify all details.
Once verified, your account will be moved to Phase 2: Integration Phase.
In the dashboard screenshot below, you can see that the Integration Phase has started but is still pending.
⚙️ Phase 2: Integration Phase
At this stage, you will begin integrating with our API.
To do this, you will need our API documentation, keys, and URLs to access the endpoints.
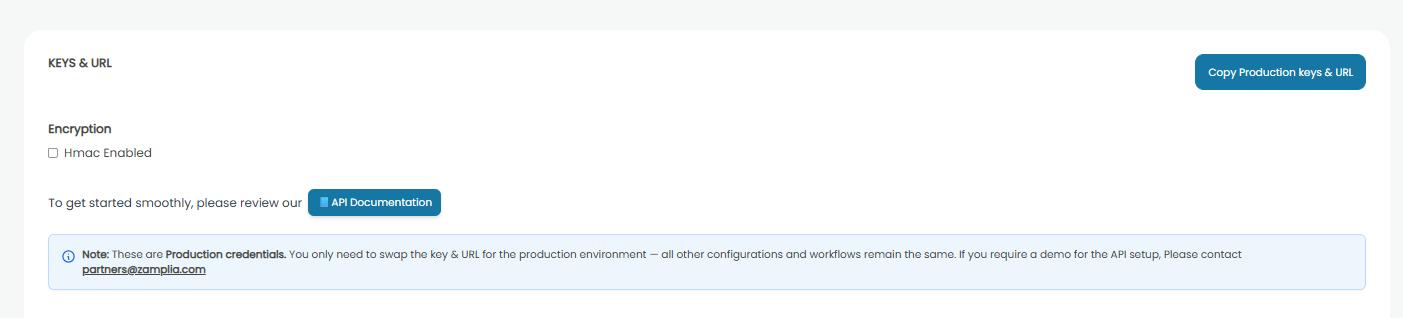
Step 1: Collect Staging Keys & URLs
- Navigate to the Keys & Encryption tab.
- Copy the staging keys and URLs and save them in a notepad.
- You will first integrate with the staging environment for testing. Once testing is successful, your account will be moved to the production environment.
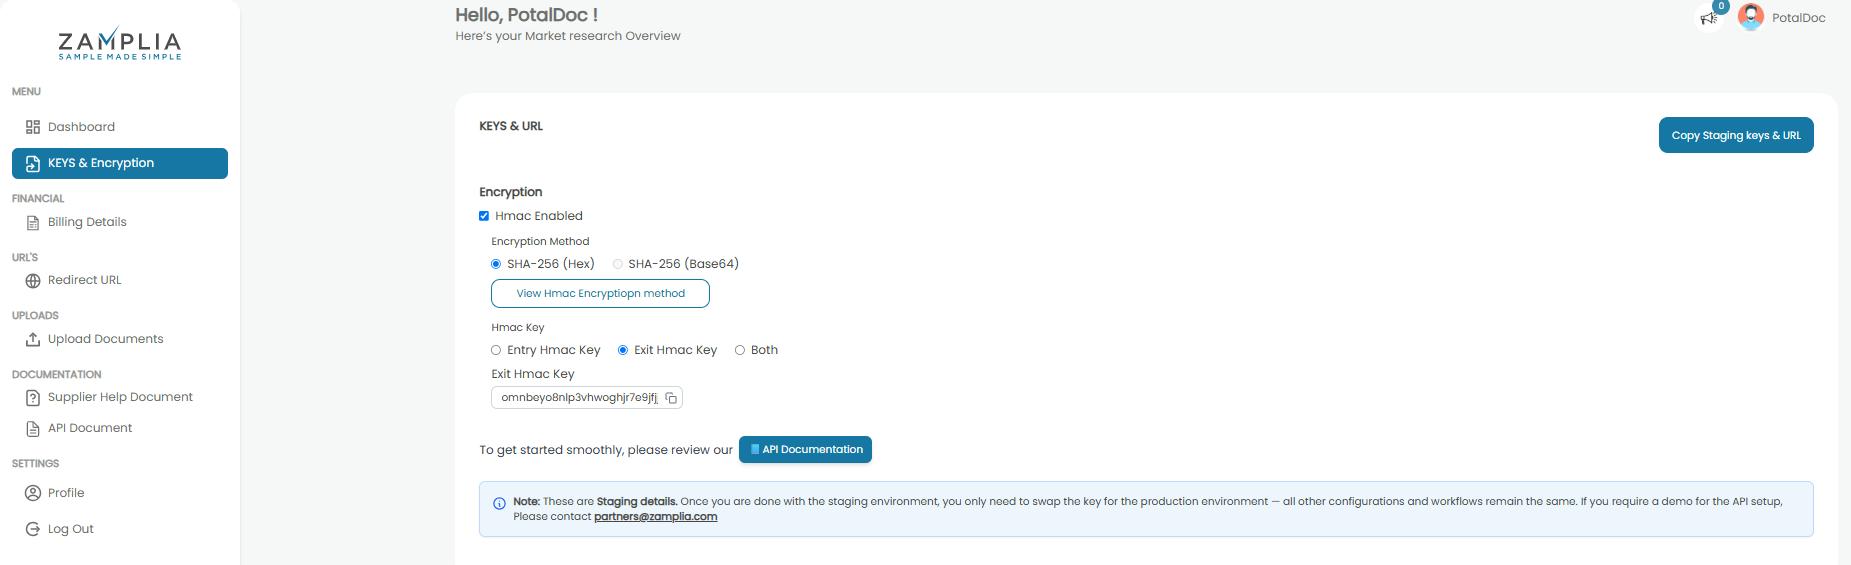
Click on Copy Staging keys & URL and then paste it on your notepad.
Step 2: Enable HMAC
- Enable HMAC for SHA-256 (Hex).
- HMAC should only be enabled for exit URLs.
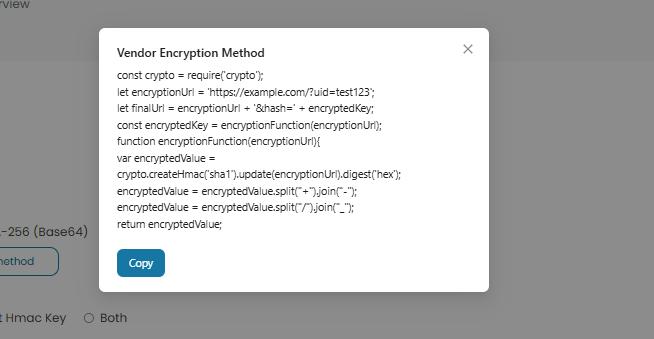
- Click View HMAC Encryption Method to see instructions on how to implement HMAC on your exit URLs.
Step 3: Access API Documentation
- Click the API Documentation button.
- You will be redirected to a new tab where you can view all the endpoints that need to be integrated into your system.
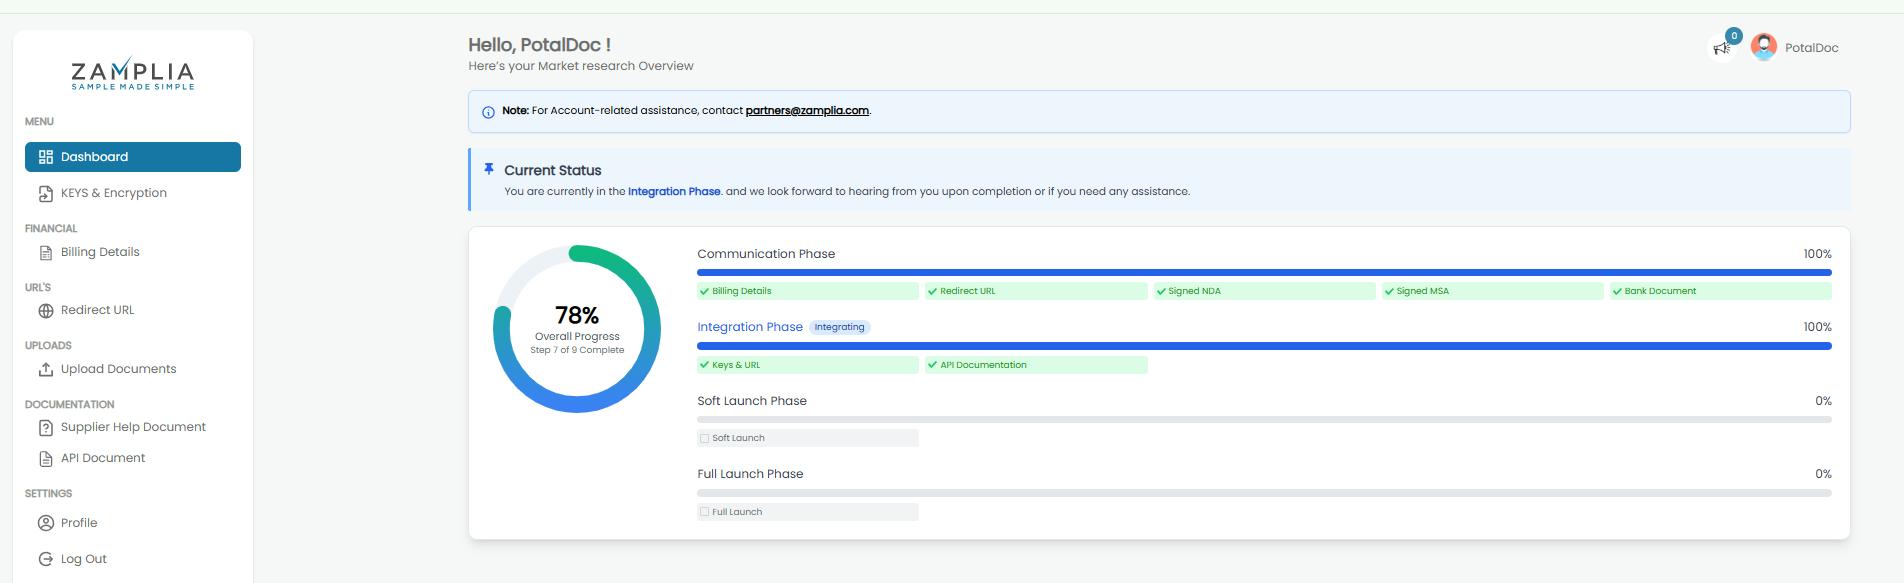
✅ After collecting these details, the Integration Phase on the dashboard will show as completed.
At this point, you must reach out to us at Partners@Zamplia.com to confirm that your API integration is complete.
We will run a final round of testing before moving your account to the live environment.
🌐 Soft Launch
Once testing is successful, your account will enter the Soft Launch phase:
- The portal UI will be updated.
- You will gain access to the traffic tracking dashboard and reporting tools.
- Initially, one market (EN-US) will be live. You can check live surveys via the GetAllocated endpoint.
- Collect the production keys and URLs from the Keys & Encryption tab to access endpoints in the production environment.
Soft Launch Details
- Only one market will be live to monitor traffic performance and confirm the integration is working correctly.
- The soft launch lasts 7 days.
- Expected traffic: 5,000 clicks per day from your account.
- After successful soft launch performance, your account will move to Full Launch, providing access to all live markets, multivariant CPIs, and a larger pool of surveys.